You know that feeling right after winter hits? Your skin is begging for gentleness, but your body is throwing up resistance. Home hair removal turns into a disaster zone. Strips that stick to skin instead of hair, wax so hot it burns, stubble that refuses to budge, and redness showing up exactly when you need to wear that short dress. It’s exhausting.
There is a fix though. A minimalist method, almost like cooking, that actually grabs hair the moment it starts to grow. No fancy gadgets. Just a specific sugar paste, cooked to the right texture, worked by hand, and pulled off without a strip. The result is cleaner skin. You feel in control. It is a slow, home-based ritual that cuts down on aggressive handling.
Why sugar wax works better than traditional strips
Sugaring, often called Eastern waxing, works because it is selective. The paste bonds to the hair, not the skin, provided you get the prep and the motion right. Classic waxes often “slap” onto the epidermis. That causes trauma. Sugaring can handle shorter regrowth more consistently. You know those tiny, annoying stubbles that appear between salon appointments? Those are exactly what this method targets.
The process is straightforward. You knead the paste, lay it down in a thin layer, and rip it away in one firm motion. No paper. No spatula. Cleanup is significantly easier.
Who benefits most? Legs, underarms, and the bikini line. Especially if your skin reacts badly to perfumed formulas. There are limits, though. If you have very thick, very short hair, or if the area is sweaty, you need precise technique and perfect temperature. Get the consistency wrong, and the grip fails. The session drags on.
The exact recipe: three ingredients, one pot
You need three ingredients. That is it.
- White sugar
- Lemon juice
- Water
Grab a saucepan. Heat it up. Mix the sugar and water until it dissolves completely. Add the lemon juice. Stir constantly.
The sugar syrup will turn from clear to a light amber. This is the critical moment. You are not looking for dark brown. You are looking for a specific viscosity. Test a drop on a cold plate. It should hold its shape but remain pliable. If it’s too runny, it won’t grip. If it’s too hard, it shatters.
Let it cool slightly. It should be warm to the touch, not hot. This is the texture that allows you to work it by hand.
Why your homemade sugaring paste fails (and how to fix it)
Success here relies on precision, not guesswork. You only need three ingredients, but they must be measured exactly. Cut corners and you get a paste that is either too soft to work with or so hard it shatters. Everything you need sits in the pantry of a standard supermarket. A kitchen thermometer is your best friend. Do not skip it.
The lemon juice is not there for scent. It stabilizes the texture and stops the sugar from crystallizing too fast. The water starts the melting process, then evaporates as you cook. Use a heavy-bottomed pot. It keeps heat evenly distributed. This prevents burnt spots or that dark, overcooked color. You want a golden amber hue. That is the sweet spot. A darker shade means you went too far.
- 400 g white sugar
- 60 ml fresh lemon juice
- 60 ml water
Heat the mixture over medium heat. Watch the thermometer closely. You are aiming for 118 °C. In confectionery terms, this is the “soft ball” stage. At this temperature, the mixture becomes uniform and takes on that amber color.
Do not rush. Remove it from the heat and let it cool. Working it hot guarantees burns and a texture you cannot manage. Wait until it reaches about 40 °C. It should feel like soft caramel. At this point, you can roll it into a ball without it stretching into a mess. Dust your fingers with a tiny amount of cornstarch. This stops the paste from sticking to your skin while still allowing it to grip the hair.
How to apply sugaring paste without pain
The skin preparation matters as much as the paste itself. Your skin must be clean and completely dry. No cream. No oil. If it is slippery, the sugar will not grip. A warm shower followed by thorough drying is usually enough. If you sweat easily, a light dusting of cornstarch helps.
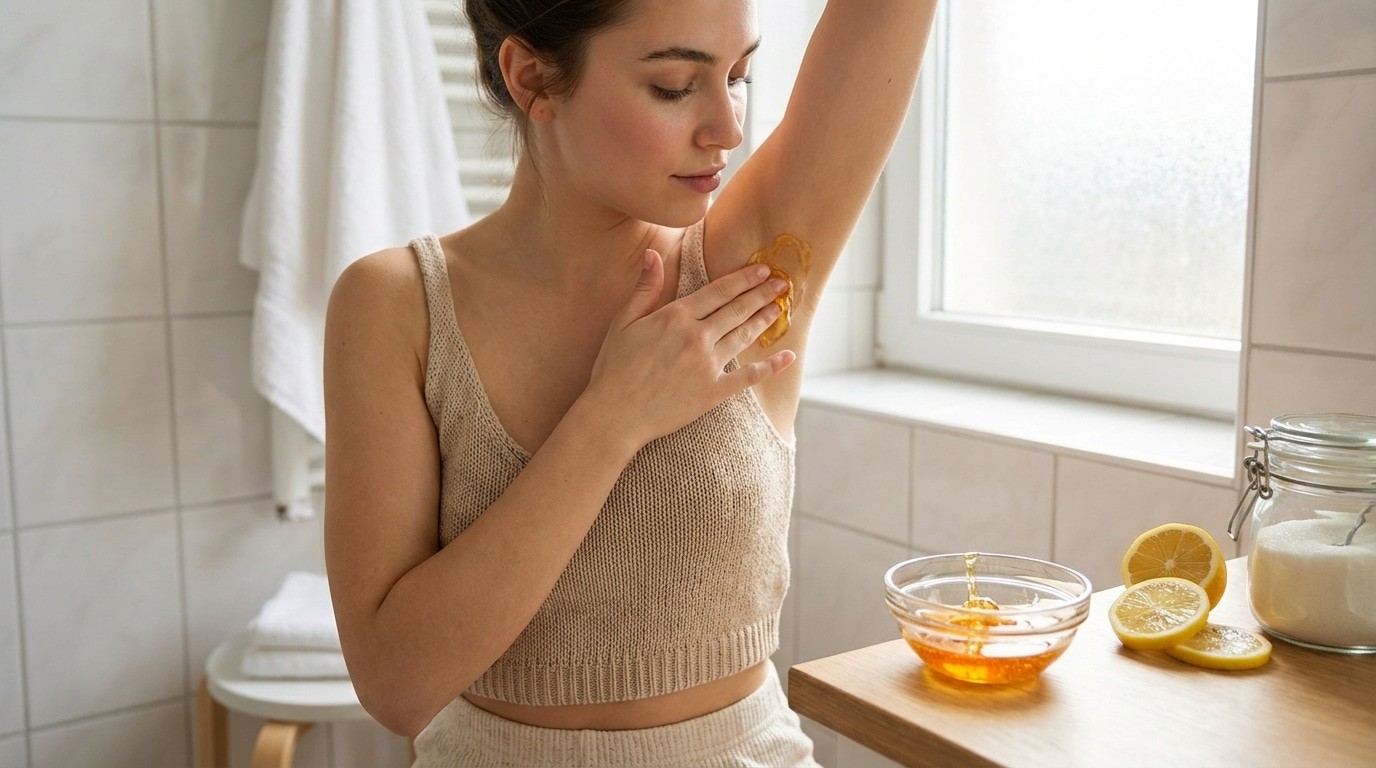
Technique is everything. Apply the paste against the direction of hair growth. Stretch it gently to ensure it wraps around the base of each hair. Remove it in the direction of hair growth. Use a quick, firm pull close to the skin. Do not yank upwards. This reduces unnecessary tension.
Keep the skin taut. This is especially true for the bikini line and underarms. Loose skin leads to uneven removal and more pain. You can reuse the same ball several times as long as it stays pliable. This saves paste and reduces waste.
Troubleshooting common sugaring mistakes
If the paste is hard and brittle, you likely cooked it too long or let it cool too much. Warm it slightly between your hands or in a warmer room to restore flexibility. If it is too soft and spreads out, you did not reach the correct temperature. Return it to the pot briefly and check the thermometer again.
Sticky paste is the most annoying issue. It usually means your skin was not dry enough, the room was humid, or you forgot the cornstarch on your fingers. Stop. Dust the area. Form a new ball. Work on smaller sections.
If hairs are breaking instead of pulling out, your removal is probably too slow or in the wrong direction. Pull faster and closer to the skin. This improves grip and prevents rapid regrowth.
Cleaning up is easy. Warm water dissolves the sugar. This is a major advantage over greasy waxes that require oil or solvents. Store leftover paste in a clean, airtight container at room temperature. Keep it dry. When you are ready to use it again, warm it between your hands.
If a stubborn area resists, do a targeted second pass. Do not rub aggressively. Sugaring is a pulling technique. The skin appreciates moderation. Afterward, rinse with cool water and apply a simple soothing care. This calms any redness without clogging the pores.
Building a routine for long-term smooth skin
The real work happens in the days after the session. Consistent hydration keeps the skin soft. Soft skin is less likely to trap hairs as they grow back. Exfoliate gently once or twice a week. The goal is to smooth the surface, not strip the skin.
Avoid tight clothing, intense exercise, and very hot baths for a few hours after sugaring. This is especially important in spring when your skin starts seeing the sun again. A minimal, unscented soothing care and good protection from friction do more than complicated products.
This regularity changes skin texture over time. You will see fewer ingrown hairs and less discomfort between sessions.
Your lifestyle impacts your skin reactivity too. Poor sleep increases skin sensitivity and makes marks more visible. A stable rhythm helps the skin recover. Daily hydration supports elasticity and prevents the “dry skin that grabs” effect. A simple diet rich in fruits and vegetables contributes to regular skin. Stress can amplify inflammation and itching after sugaring.
Combine a properly cooked sugar paste, a clean technique, and a gentle maintenance routine. Home sugaring stops being a gamble. You might wonder which zone to test first. Start somewhere small to master the technique without pressure.